Table and column properties include the table and column classes. You can configure your own table and column classes depending on your requirements.
To configure table classes, follow these steps:
- Go to Application Menu > Settings > Metadata Manager.
- Under the Table Class section, click
 .
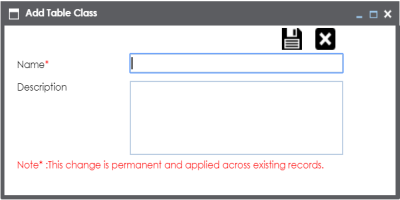
. - Enter the Name and Description of the table class.
- Click
 .
. - Use the following options:
- Edit (
 )
)- To edit the table class, click
.- Delete (
 )
)- To delete the table class, click
. - Edit (
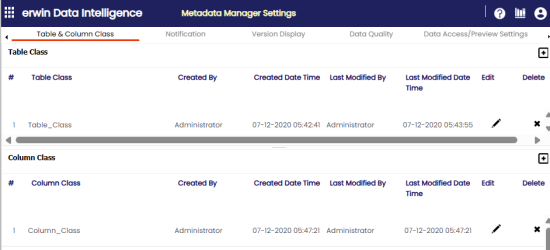
The Metadata Manager Settings page appears and by default the Table & Column Class tab opens.
The Add Table Class page appears.
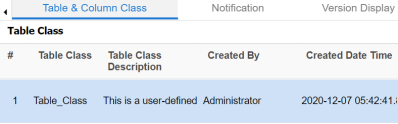
The table class is created and saved in the Table Class grid.
To configure column classes, follow these steps:
- Under the Column Class section, click
 .
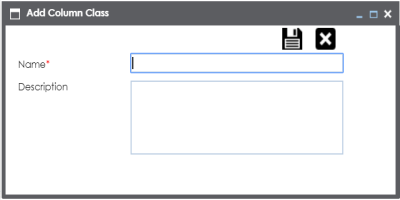
. - Enter the Name and the Description of the column class.
- Click .
- Use the following options:
- Edit (
)- To edit the column class, click
.- Delete (
)- To delete the column class, click
. - Edit (
The Add Column Class page appears.
The column class is created and saved under the Column Class grid.

You can update table and column properties in the Metadata Manager using the table and column classes.
For more information on updating table properties, refer to the Updating Table Properties topic.
For more information on column properties, refer to the Updating Column Properties topic.